

There are two ways to generate reports for individual locations
- POS System.
- Pospointe Cloud Portal.
- POS System.
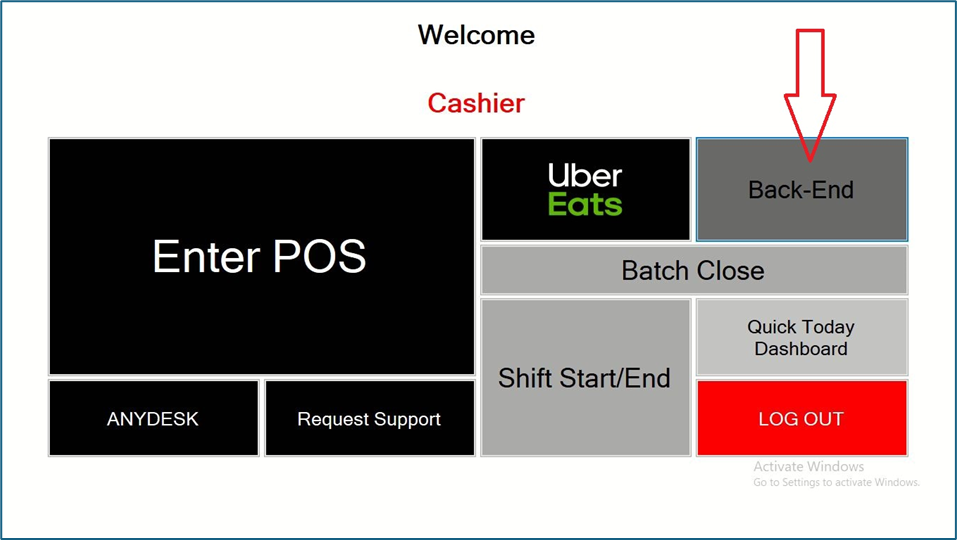
a. Click on to the Back-end Button on the POS System.
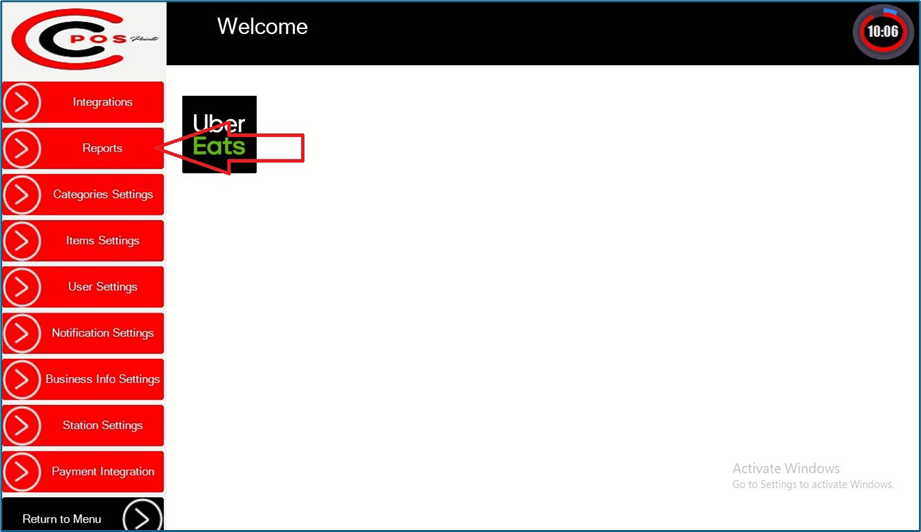
b. Select the Reports option on the side menu.
c. Then select the date range for the sales and choose FLASH SUMMARY as the report type and click on the view button to view the reports for the date that you entered.

d. finally click on to the print button on the report in order to print your flash report.

- Pospointe Cloud Portal
- Go to the Pospointe Cloud Portal at https://mypospointe.com/. Enter your Pospointe Cloud portal credentials and log in to the webpage

- Select the store for which you need to generate the reports.

- Select the Flash Report Option from the side menu. Enter the specific dates for which you want to view the reports. If desired, print the reports.

