
To create categories for menu organization, follow these steps through the MyPOSPointe Portal:
1. Access the MyPOSPointe Portal
- Open your web browser and access the MyPOSPointe: https://mypospointe.com/.
- Enter the Email and Password provided by the Tech Support Team.
2. Navigate to Inventory
- Once logged in, you will see a list of options on the left side.
- Click on Inventory from the menu.

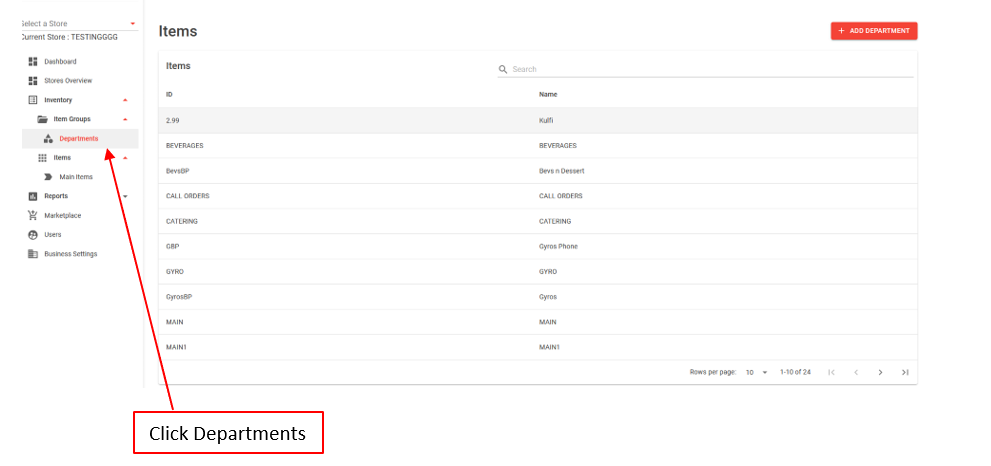
3. Access Departments
- Under the Item Groups section, click on Departments.
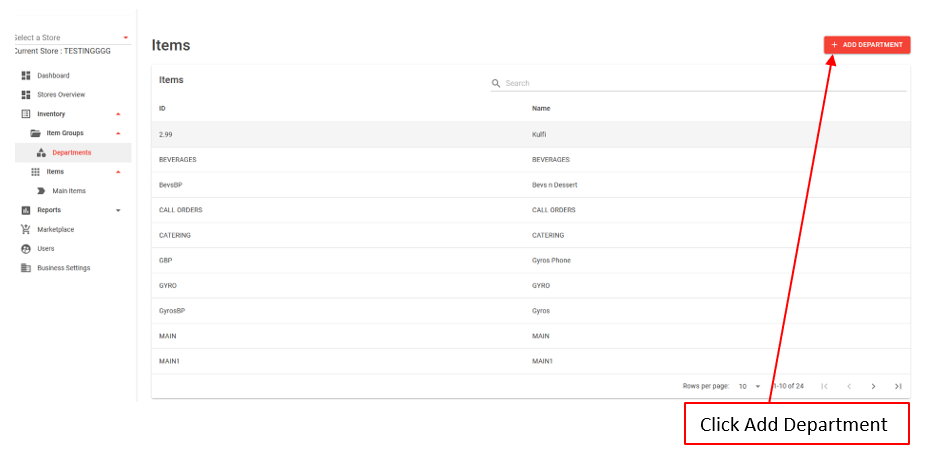
- On the right side, you will see a list of departments currently available in the POS system.
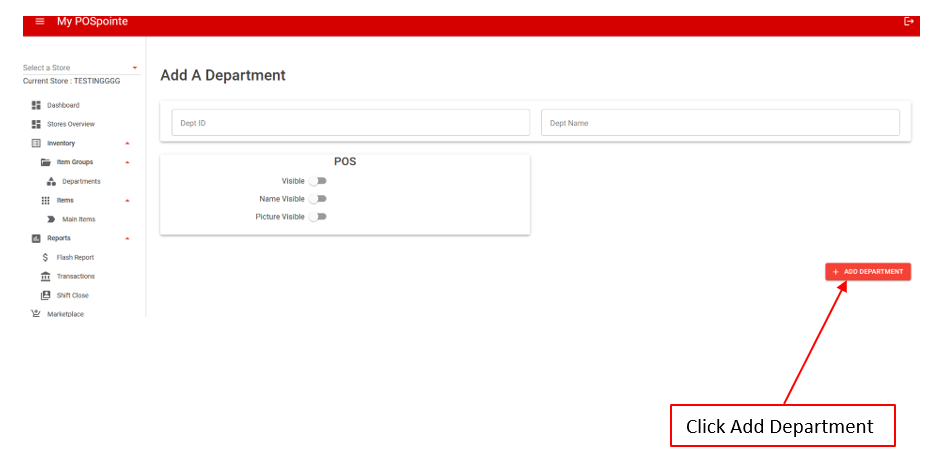
4. Add a New Department
- Click the Add Department button to proceed with creating a new department or category.
5. Enter Department/Category Details
- A new page will open where you can enter the department or category details:
- Dept ID: Enter a department ID.
- Dept Name: Enter the name for the department or category.
6. Configure Permissions
- Under the department details, you will see permission options:
- Visible: Toggle visibility for the department.
- Name Visible: Choose whether the department name will be visible.
- Picture Visible: Choose whether the department picture will be visible.
- Enable the permissions as needed based on your preferences.
7. Save the Category
- After entering all the required details and adjusting the permissions, click the Add Department button to save the new category.