

What is Department ?
Department is referring to a category or grouping of products or services within the inventory. It is a way to organize and classify items to make the sales process more efficient and to facilitate better tracking and reporting.
How to add a department ?
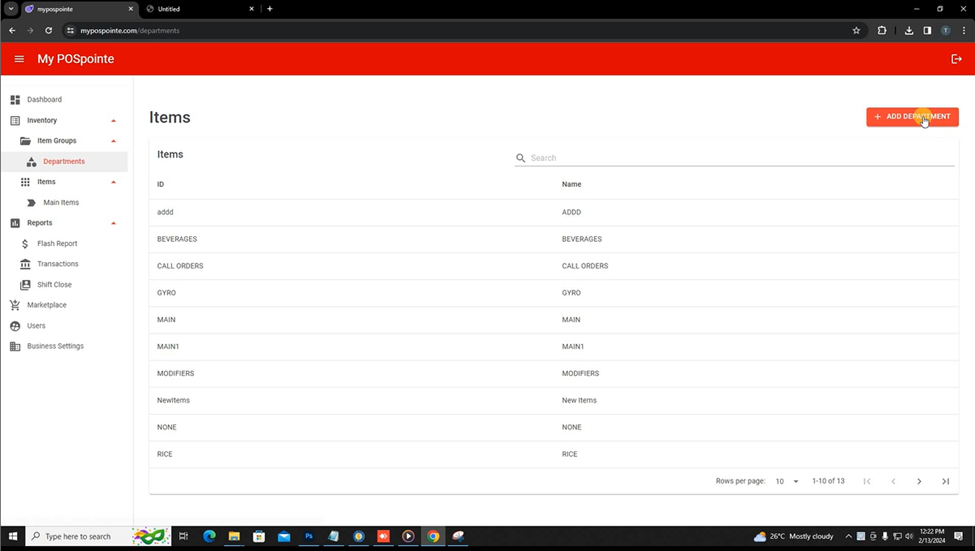
Step 01: Click Inventory and Select “Item groups” and Click on Departments
As the first step, navigate to the Inventory section and choose “Item groups.” Following this, click on “Departments.” This sequence of actions typically occurs within a system interface, allowing users to manage and organize items into groups or departments for streamlined inventory control and categorization in the POS (Point of Sale) system.

Step 02: Click on ADD DEPARTMENT
To add a department, click on “ADD DEPARTMENT.” This action typically opens a new section or form in the interface where users can input details such as the department name, description, or any other relevant information. Adding a department helps in organizing and categorizing items efficiently within the POS (Point of Sale) system.
Step 03: Enter Department ID and name
The Department ID must be unique, ensuring no duplication within the system. The department name can consist of a maximum of 30 characters, providing a concise yet descriptive label for organizational purposes. These specifications help maintain data integrity and streamline item categorization within the POS (Point of Sale) system.

Step 04: Do the necessary updates in the pos bar
- Visible button – That allows users to control the visibility and availability of specific departments. departments represent categories of products or services, and hiding a department essentially means making it inaccessible for sales transactions. This feature can be useful in scenarios where a business temporarily does not want to sell products from a particular department, perhaps due to seasonal changes, inventory updates, or other reasons. By turning off or hiding a department, the system ensures that the associated products or services are not available for purchase during the specified period. This can help businesses manage their offerings more effectively, control the availability of certain items, and tailor their product selection to meet specific business needs or strategies.
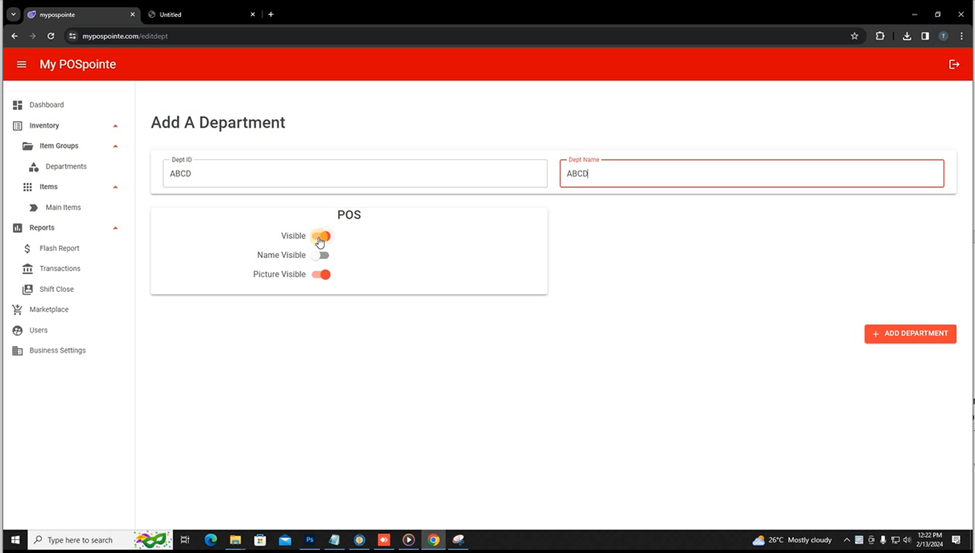
- Name Visible – By “turning this one,” it implies that there is a setting or option within the POS system that users can activate or deactivate to hide the department names. This feature might be useful for businesses that want to customize the display on the POS interface, perhaps during certain promotions, events, or when a particular visual or informational element is not relevant or desired. In essence, it allows users to manage the information presented on the POS system by choosing whether or not to display department names, providing flexibility in tailoring the system’s appearance to specific business needs or preferences.

- Picture visible – In this context, a department picture likely refers to an image or visual representation associated with a specific product category or department. By “turning this one,” it implies that there is a setting or option within the POS system that users can activate or deactivate to hide the department picture. This feature might be useful for businesses that want to customize the display on the POS interface, perhaps during certain promotions, events, or when a particular visual element is not relevant or desired. Essentially, it allows users to manage the visual presentation of the POS system by choosing whether or not to display department pictures, providing flexibility in tailoring the system’s appearance to specific business needs or preferences.

Step 05: Click Add Department
Before adding a department to the POS cloud system, you need to provide specific information about the department. This information might include the department name, category, pricing details, or any other relevant data. After entering the required details, the next step is to click on the “Add Department” button. This action signals the POS system to save and include the newly defined department into its configuration.

How to Edit a department ?
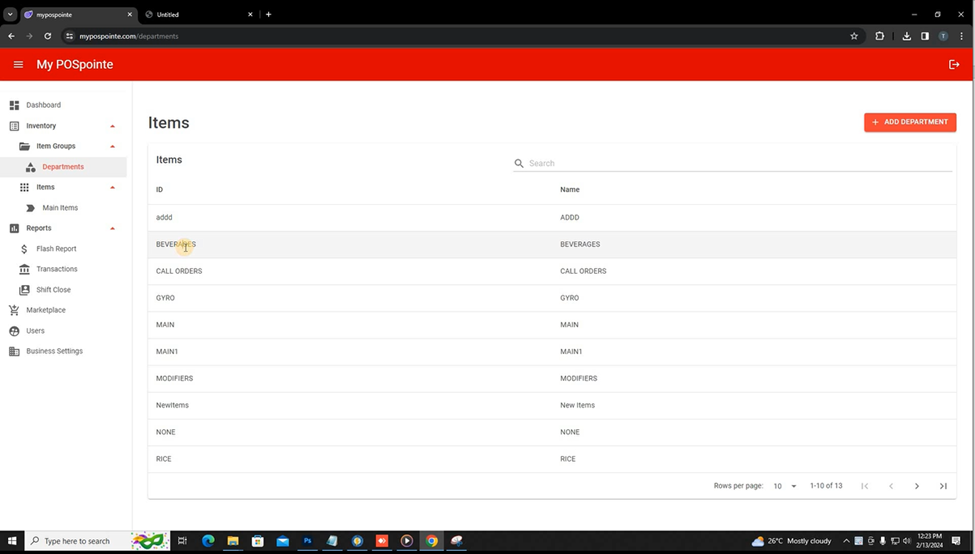
Step 01: Select the department
Begin by choosing the specific department that you intend to modify. This selection is typically done from a list or menu of available departments within the system.
Step 02: Edit the department
Navigate to the section of the POS system where you can modify department information Once in the editing interface, you can update various aspects of the department

Step 03: Click on update
After making the necessary changes to the department details, ensure that everything is as desired. In the user interface of the POS system, find the button labeled “Update.” This button is specifically designed for confirming and saving the modifications. Execute the final step by clicking the “Update” button. This action signals the system to save the changes you’ve made to the department details.

