

If your printer becomes disconnected, follow these steps to restore the connection:
1. Check Physical Connections
- Ensure all cables are securely connected to the printer and your network or computer.
- For Ethernet connections, confirm the Ethernet cable is properly plugged into both the printer and the router.
- Inspect cables for visible damage or wear and replace if necessary.
2. Verify Network Configuration
- Confirm the printer is connected to the same network as your POS system or computer.
- For Wi-Fi connections, ensure the printer is connected to the correct wireless network.
3. Access and Update Printer Drivers
On Windows 10:
- Open the Start menu and search for Control Panel.

- Navigate to Programs and Features.

- Locate and uninstall any existing printer drivers, including Epson drivers, if applicable.

4. Uninstall and Reinstall Printer Drivers
- Go to Devices and Printers in the Control Panel or Settings menu.
- Find the disconnected printer, right-click it, and select Remove Device to uninstall.
- Visit the printer manufacturer’s website (e.g., Epson) and download the latest driver for your printer model.
- Install the driver by following the on-screen instructions.
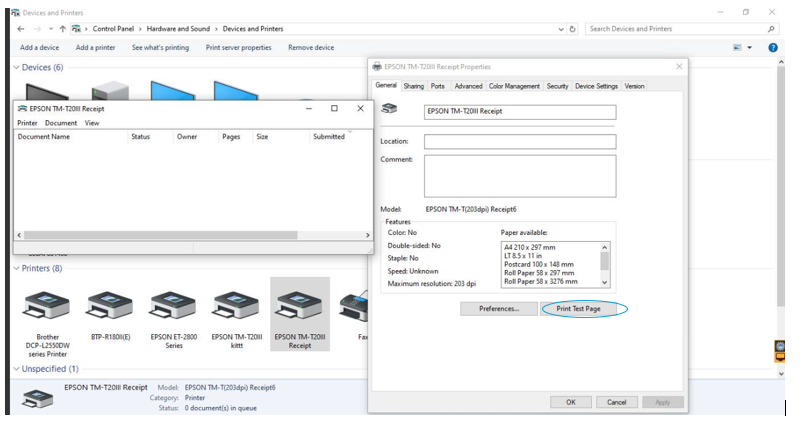
5. Perform a Test Print
- Access the printer in the Devices and Printers section.
- Click on See What’s Printing to check its status.
- Open Printer Properties and select Print Test Page to verify functionality.
- The test page will confirm if the printer is connected and working correctly.
6. Update the Main POS System
- Open the Main POS system and go to Settings.

- In the Select Printer dropdown menu, locate and select your printer model.
- Click the Update button to save the settings.

